If you need to know how to install a mobile radio for an upcoming installation – or struggling with an installation in progress – we've made a video you won't want to miss. In our latest video offering, one of Chicago Communications' expert technicians shows how to install a mobile radio, step by step.
This video joins two other recent installments, including a whiteboard video on how two-way radios work and a video on two-way radio repair. One of our main goals with these videos is to demystify products or processes that are vital to keeping everyone at your department, business or campus in constant contact. The more you understand about how your technology works, the easier it is for you to use, maintain and keep it in great shape.
How Hard Is It to Install a Mobile Radio?
As shown in the video, there are six main steps of mobile radio installation:
- Installing the antenna
- Routing the antenna cable
- Running the power cable through the firewall grommet
- Securing and protecting the cable
- Final connection to battery
- Mounting the radio
Installing a mobile radio requires working on the vehicle’s roof, the interior, under the hood, then back on the central console. A certified professional can perform this installation efficiently, having done so many times before. With a running time of just under three minutes, the video gives a sense of how familiarity and experience with such an installation can greatly increase efficiency.
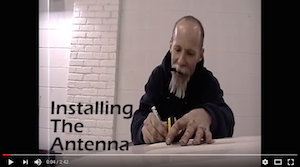
Installing the Antenna
In this first step, the tech marks a spot on the car’s roof before drilling a hole and threading a cable line into the hole. Next, he bolts down the antenna and secures it into place.
Routing the Antenna Cable
The threading process continues as the tech takes the cable from the roof, down the passenger side interior, in through the floor and to the center console where the radio will rest. Once that’s done, he finishes off the end of the cable so it can be connected.
As you watch, note how meticulous he is about returning all parts of the vehicle back to their original state. Unless you’d seen it done, you’d never know holes had been drilled, cables run or parts displaced. That’s the level of detail our customers have come to expect from our technicians.
Running the Power Cable Through the Firewall Grommet
This part of the process involves bringing the cable down under the steering wheel and under the hood…
Securing and Protecting the Cable
…where cable ties are used to make sure everything stays in place…
Final Connection to Battery
…so the system can be connected to the battery.
Mounting the Radio
Once the cable work is done, the radio is mounted into place. It’s remarkable to see such precision work accomplished in such a tight space with so many awkward angles and low light.
And with that, the mobile radio and its component parts are ready to roll.